Assessing the wound bed and the area around the wound bed is a core part of the patient assessment process and is critical to patient care success.
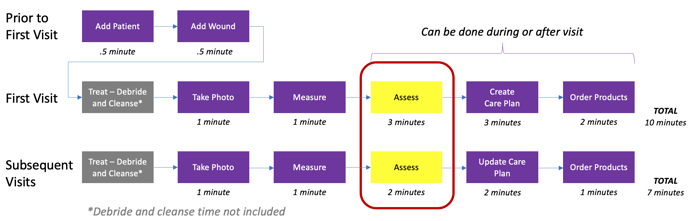
Assessing the wound bed and the area around the wound bed is in the middle of the Archangel process flow(see yellow box below) and will take the clinician approximately 2-3 minutes to complete, depending on how experienced the clinician is using Archangel. The time will also be depend on how your organizations ADMIN set-up the screens and frequencies for the Assessment. In any case, assessing the wound bed in Archangel is fast and easy.
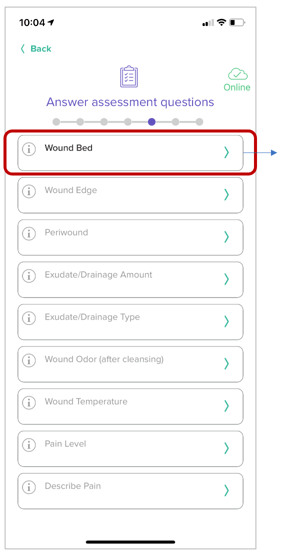
This part of the assessment is comprised of 10 elements as follows:
- Wound Bed Tissue Type
- Wound Edge
- Peri-wound
- Exudate/Drainage Amount and Type
- Wound Odor
- Wound Temperature
- Pain Level/Describe Pain
- Tunneling
- Undermining
- Assign Next Assessment Date
These elements are found on the assessment home screen. Start by clicking the "Wound Bed" button.
1. Wound Bed Tissue Type
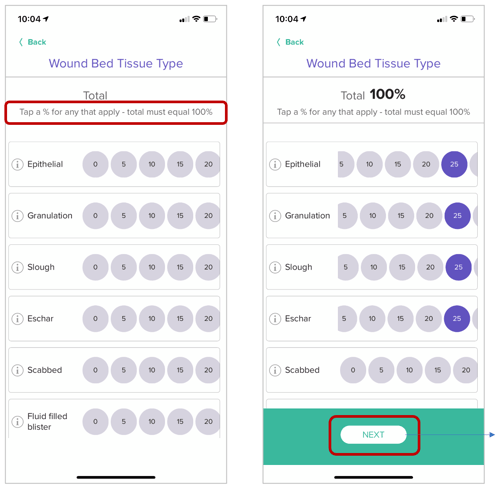
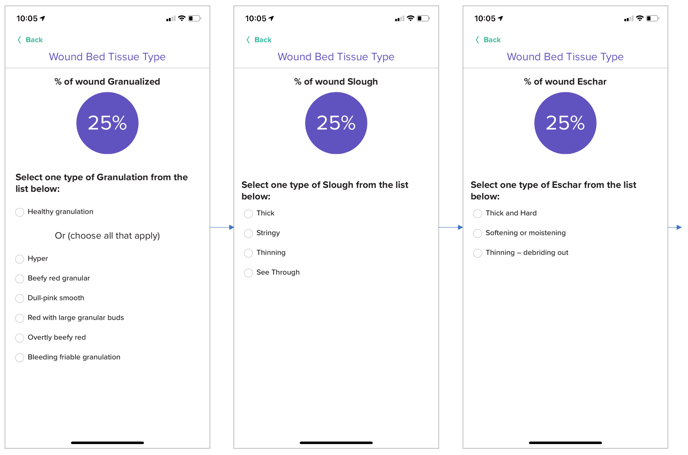
After determining the tissue types for the wound you are assessing, this screen allows you to document the %'s of each of those tissue types. The screen only shows some of the tissue types, scroll down the screen with your finger to see additional tissue types selection options.
Simply tap on number(s) that corresponds to the % you are wanting to document. In the example below, 25% is tapped each for Epithelial, Granulation, Slough and Eschar. The total needs to be exactly 100% or else the green NEXT button will not appear and you cannot proceed to the next screen. Notice you can SWIPE each tissue type left and right to move the %'s from 0% all the way to 100%(swipe all the way to the left with your finger to get to 100%).
If you select a % greater than 0 for either Granulation, Slough or Eschar you will be presented with either of the screens below to further document the tissue type characteristics. Tap on one of the small circles in each screen to make your selections.
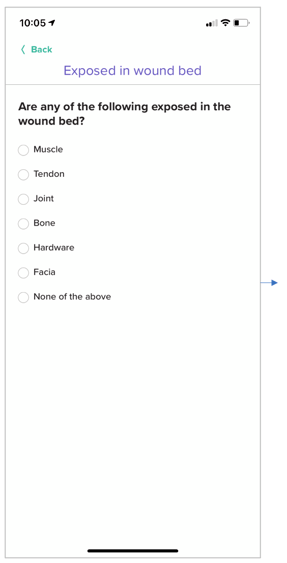
The final screen for wound bed tissue type is seen below. Tap on one or more of the circles to select if there are any exposed elements in the wound bed.
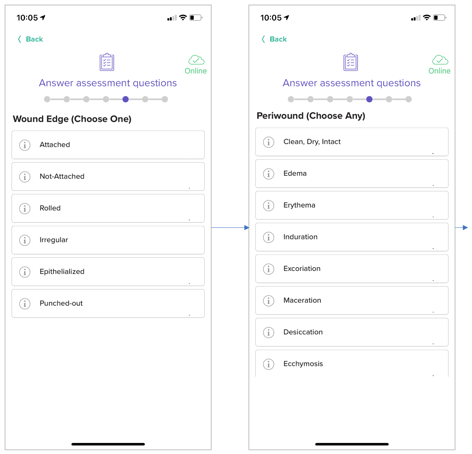
2. Wound Edge and 3. Peri-wound
Choose one selection that applies for Wound Edge on the screen seen below(left) and choose one or more selections that applies for Peri-wound on the screen seen below(right).
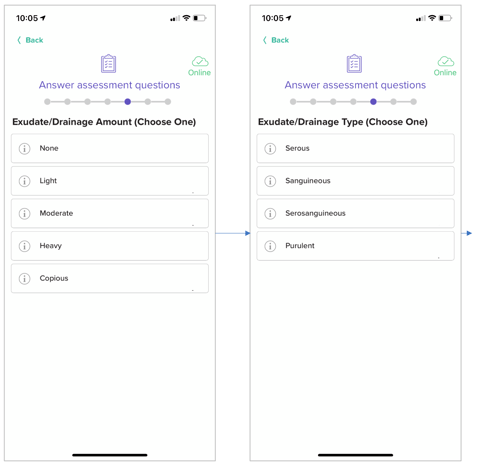
4. Exudate/Drainage Amount and Type
Next, you are asked to document the Exudate(aka Drainage) AMOUNT and TYPE in the screens below. Make your selection by tapping on one of the buttons on each screen.
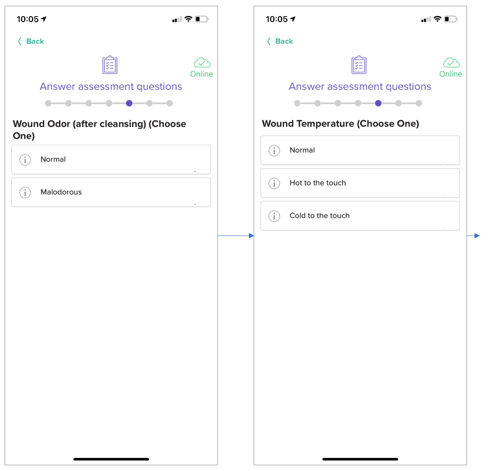
5. Wound Odor and 6. Wound Temp
Next up are ODOR and TEMPERATURE. Simply click your selection for each. Note, the ODOR answer is for "AFTER CLEANSING" and not before.
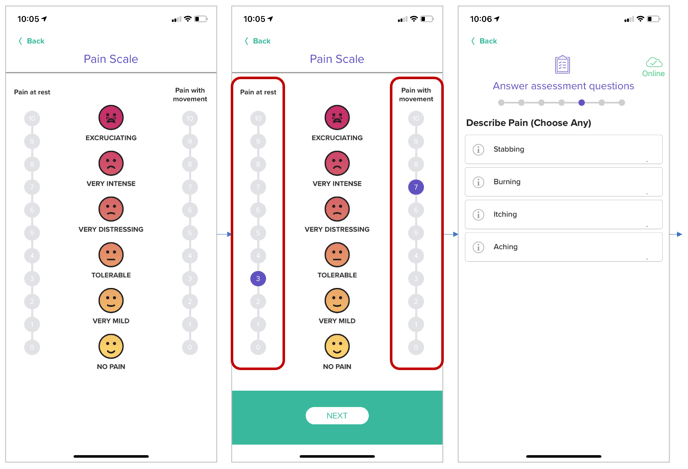
6. Pain level and description
Continuing on to documenting PAIN. As you can see below the Pain Level is recorded as "Pain at rest" and "Pain with movement". Click on the number for each on the scale from 1-10 and then click the green NEXT button. This takes you to the Describe Pain screen(see below right). Choose any pain descriptions that apply.
8. Tunneling
Click on the Tunneling button(see screen below left) to proceed to the diagram(see screen below middle). As the directions on the screen indicate, tap on the number(s) where the tunneling is located. In the case below you will notice 2, 3 and 4 were chosen as the location. Next, tap one of the numbers A SECOND TIME, to indicate where the tunneling is the longest. Next, tap on the area that says ENTER . . .
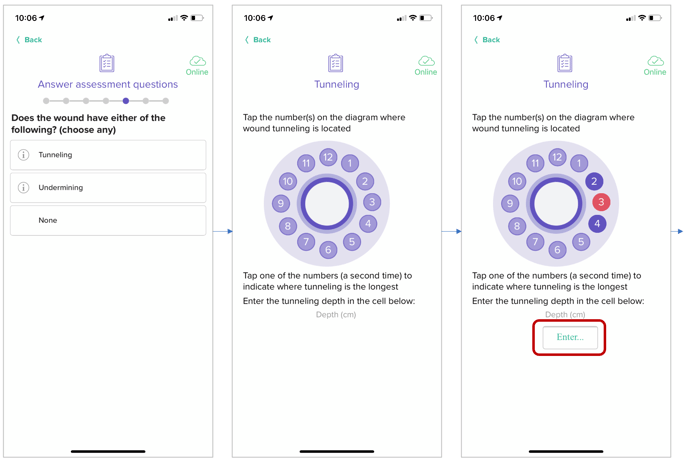
. . . Tapping ENTER will open a numeric picker. Slide up the screen with your finger so you can see and use the entire numeric picker(see center screen below). Then, select the series of numbers to the left and right of the decimal that is the depth of the tunneling-in this example it is 2.10. Click the "SET" indicator and the depth is saved in the cell. Click NEXT to proceed to the next screen.

9. Undermining
Undermining works the same way as Tunneling (see above).
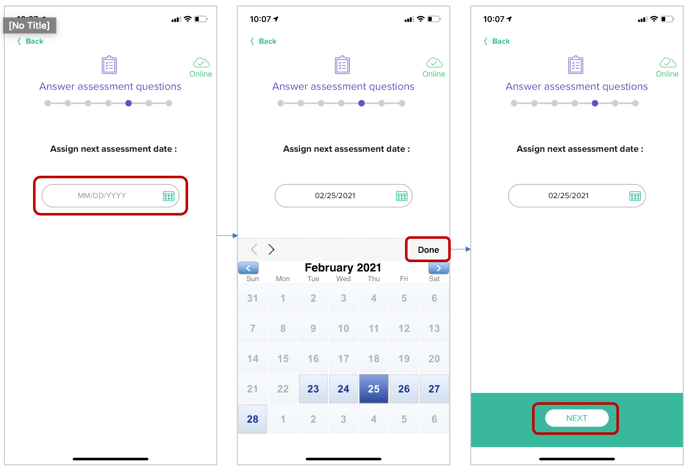
10. Next Assessment Date
Click on the area with the MM/DD/YYY (see left screen below) and it will open up a calendar (see middle screen below ) to choose a date in the future. Click on a a day box in the calendar and then click the "Done" button. Finally, click the NEXT button to move onto the next part of the assessment which is the Wound Type and Stage/Thickness(click for article).